This tutorial will walk you through the steps of exporting a section cut from a SketchUp model to a 2D line drawing in AutoCAD.
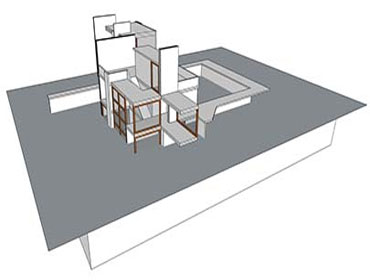
1. Draw a large rectangle on the plane of where you want the section to be. It can be vertical, horizontal, or even at an odd angle. The reason for doing it this way instead of using SketchUp’s built in section cut tool is that this way eliminates the empty spaces where a mass has been cut, revealing the geometry below. Example: If part of a floor is cut through, the floor should appear to be solid instead of showing any lines from the top of the walls on the floor below. It isn’t that difficult to remove the extraneous lines from the section cut tool if your model is simple, but when it gets more complex, it can become confusing as to which lines should actually be hidden.
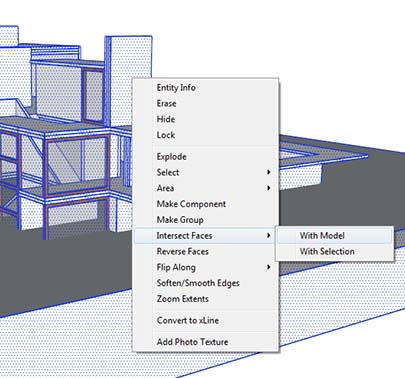
2. The next step involves intersecting the geometry, but before doing this, make sure all parts of your model are not grouped, but that the cutting plane you drew earlier is in a group. Now select all of the model geometry, and intersect the faces with the model (right click > intersect faces > with model). This will draw a line anywhere the plane cuts through the model.
3. Delete the cutting plane and you’re left with the model and the intersected lines. Now all of the geometry that is being cut through has to be deleted. The easiest way to do this is to switch the camera to parallel projection (camera > parallel projection), switch to one of the head one views, such as top down for a plan view, or one of the side views for a section (camera > standard views > top/front/back/etc…), and drag a box around all of the geometry that has to be erased. You may have to zoom in closer to some areas to make sure there aren’t any small lines left over.
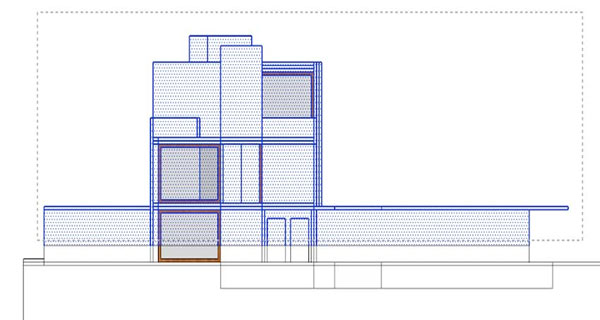
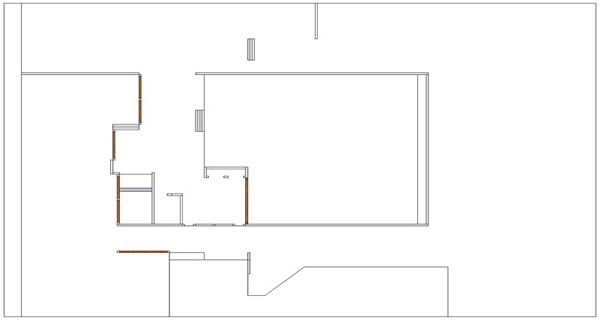
Tip: Since this technique is not restricted to just one cutting plane, you can use as many as you want to create stepped-sections (when parts of the model are cut through in different areas). Example here (profile view of a cut of a floor plan)
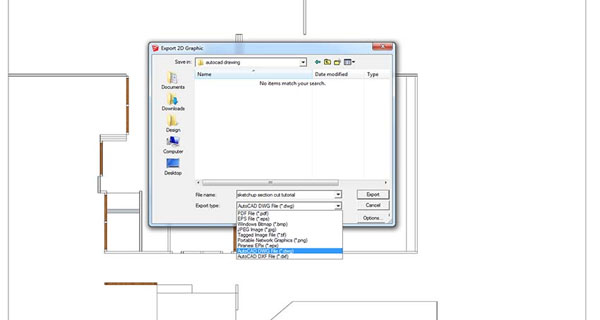
4. Now that the model is cut at the right spot, it’s time to export it to AutoCAD. Your view should be set to one that shows the model in a head on orientation, and make sure the camera is set to parallel projection. If the cut is a floor plan, you’d select top down view in the camera menu. If it is a section, you’d switch to one of the side views to get the right angle.
5. Center the model in the view, and then go to file > export > 2d graphic, and select AutoCAD DWG file in the export type drop-down menu. You may have to adjust the AutoCAD version in the options menu depending on which one you have installed. Make sure that the full scale option is checked, assuming you want the scale of the drawing to stay the same when exported.
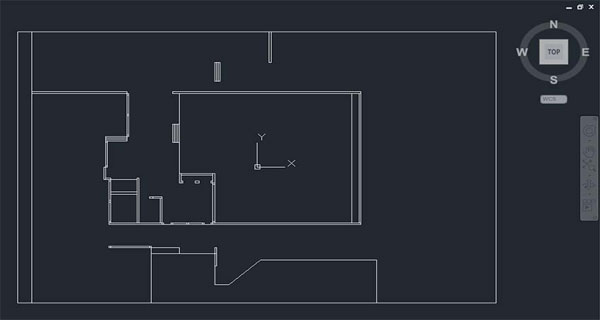
6. Save and then open up the file in Autocad. You’ve successfully exported a section or floor plan from your SketchUp model to AutoCAD. You can now adjust the line weights to your heart’s content.
~~~~~~~~~~~~~~~~~~~~~
Published By
Arka Roy
www.sketchup-ur-space.com
~~~~~~~~~~~~~~~~~~~~~
No comments:
Post a Comment